联想Flex2 14AP-IFI这是一款只有14英寸的二合一笔记本,携带方便,可以在没有压力的情况下运行一些大型游戏,比如吃鸡。这款笔记本支持十点触摸,使用起来很有感觉。但是因为它是预装的Windows8.很多朋友不习惯1系统,所以小编今天会帮这些朋友给这个联想Flex2 14AP-IFI快速重新安装笔记本最受欢迎的笔记本Windows10系统,以下是具体方法。让我们看看。
系统下载地址:www.xitongzu.net
一、准备工作
1、8G或大容量空U盘
2、制作pe启动盘:微pe如何制作u盘启动盘?(UEFI&Legacy双模式)
3、win10系统下载:www.xitongzu.net
二、BIOS修改并启动U盘
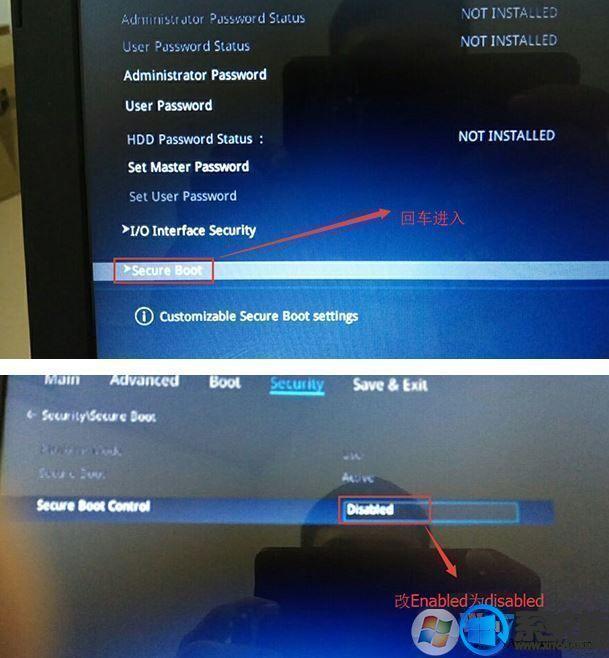
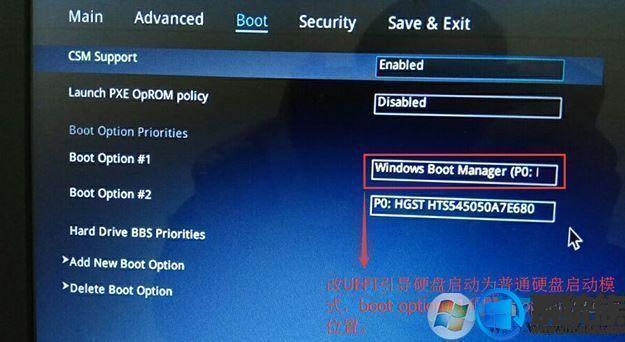
1.重启笔记本按压esc进入BIOS设置,然后按F进入高级模式,按→移动方向键Security,选择Secure Boot,然后回车进把手Secure Boot control选enabled改为disabled关闭安全启动,然后按F10保存重启;
2.重启后切换BOOT分别选择fast boot和csm support由disabled改成enabled,快速启动快速启动和兼容模式;
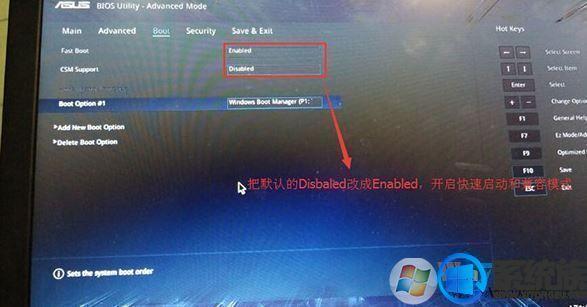
3、继续把boot option#1选项改为普通引导,boot option#1和boot option#2硬盘启动位置对换,普通硬盘引导设置第一个启动项,带Windwos Boot Manager的为UEFI引导分区;
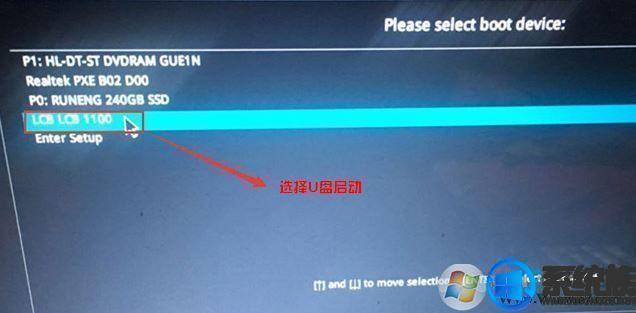
4.插入U盘启动盘,重启按钮ESC选择识别U盘启动项,回车;
三、U盘重装win教程步骤如下
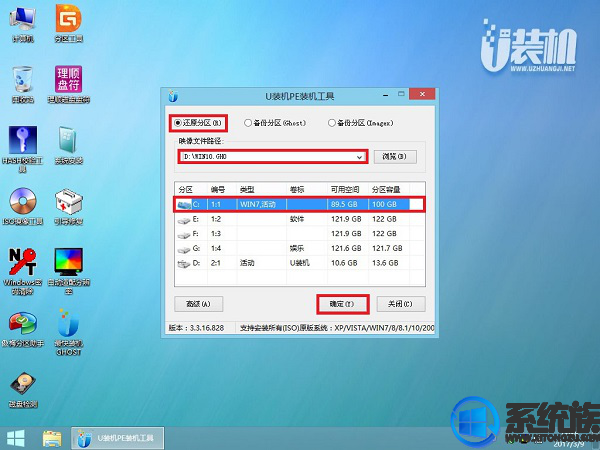
1.制作u装机uefi pe启动U盘后,将ghost win直接复制到U盘gho目录下;
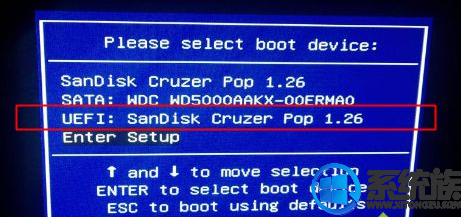
2、在uefi将U盘插入电脑,启动后不断按压F12或F11或Esc等待快捷键,不同的计算机启动键不同,选择弹出启动项选择框中识别的U盘选项,如果有UEFI的启动项,要选择uefi回车从uefi引导;
3.进入U盘安装页面,选择02项回车运行PE系统。
4、进入pe后打开 DG分区工具;
5.选择固态硬盘,点击快速分区设置分区类型【GUID】,设置分区的数量一般为120G固态小编直接分两个,主分区 60G D盘50G,然后检查【对齐分区到此扇区的整数倍】,在下拉菜单中选择下一个 4096 点击确定分区;

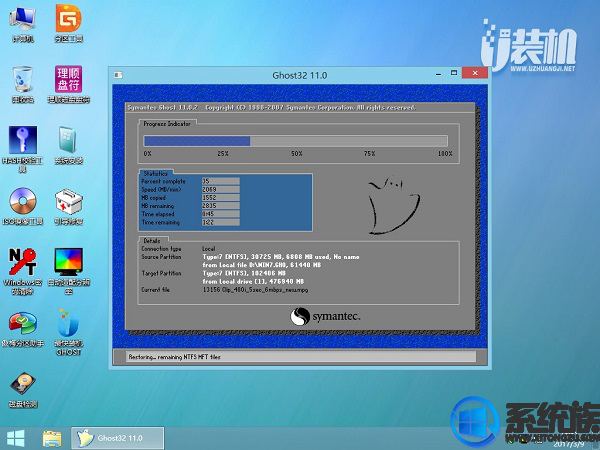
6.点击方框中的最快安装,保持默认设置,在U盘中选择win7.gho单击安装位置(推荐C盘)确定文件。
7.在此界面执行win7系统的解压操作。
 7.在此界面执行win7系统的解压操作。
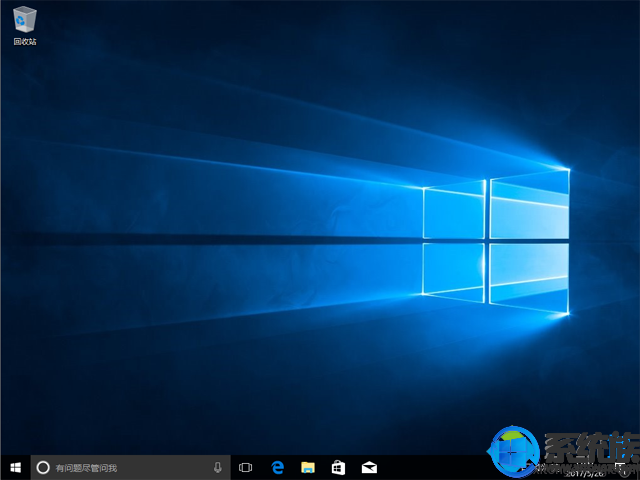
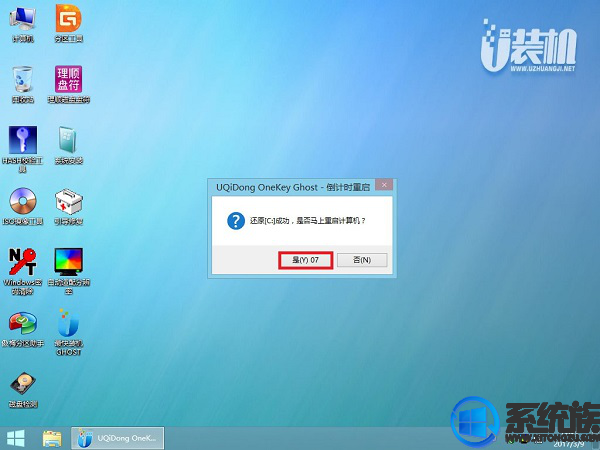
不要动任何鼠键!系统备份还原后,可自动进入系统桌面。
【图文】联想Flex2 14AP-IFI快速安全重新安装Windows今天就在这里分享10个系统的内容。上述方法可以有效地帮助用户完成重新安装系统的目的,因此不了解具体过程的朋友可以认真学习,这将对您有所帮助。最后,感谢您的阅读。下次见!
![RedHat服务器上[Errno 5] OSError: [Errno 2]的解决方法](https://img.pc-daily.com/uploads/allimg/4752/11135115c-0-lp.png)