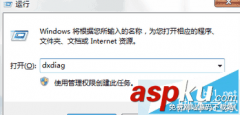
首先在开始备份之前,我们需要下载好内置Ghost软件的工具,目前主要两种工具含有Ghost软件:“大白菜”和“老毛桃”,这两个工具均带有U盘启动制作功能,笔者建议采用4GB以上U盘;此外Ghost版本的Win7安装光盘/U盘均集成Ghost工具。

大白菜安装U盘启动盘制作工具的界面
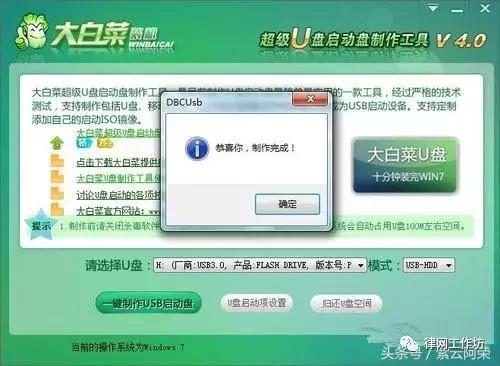
大白菜安装U盘启动盘制作完毕
大白菜U盘启动工具制作只需要轻轻一按“一键制作USB启动盘”选项,即可完成U盘启动盘制造。这款U盘启动盘制造工具内嵌Windows PE系统,集成DOS工具箱、分区等多种工具,功能全面。
大白菜U盘启动工具的操作主界面
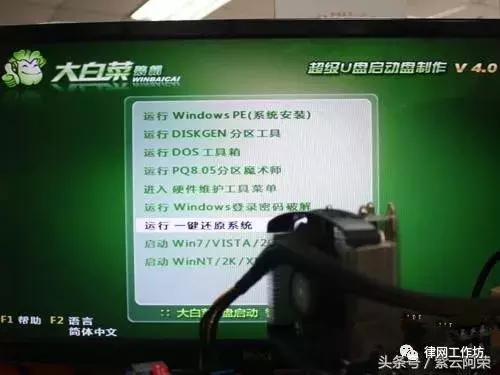
我们将U盘作为第一启动项,进入大白菜U盘工具的主界面,点击运行“一键还原系统”选项。
大白菜U盘启动工具的Ghost版本选择
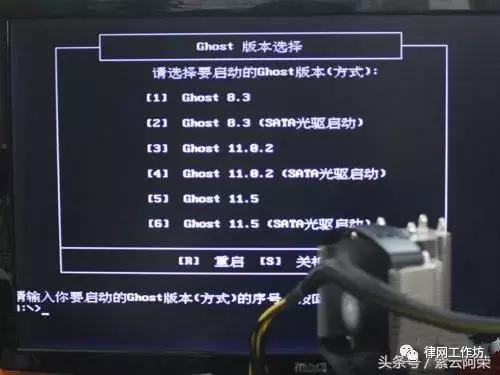
随后我们进入Ghost版本选择界面,选择第5项“Ghost 11.5”,进入Ghost操作主界面。
用户使用Ghost软件安装Win7,首先需要下载Win7镜像文件,容量不足4GB,可以放在“大白菜”或者“老毛桃”启动U盘的副盘,用户也可以放在硬盘上。
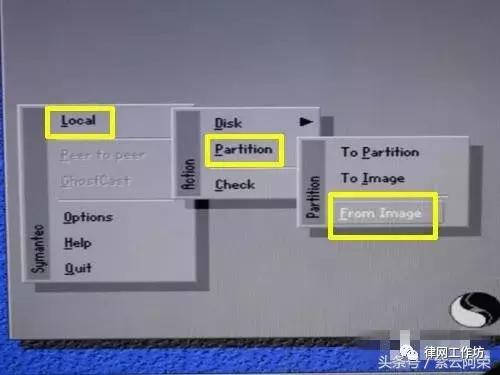
步骤一:打开“From Image”选项
(1) 首选打开Ghost工具,进入界面后,选择“Local”→“Partition”→“From Image”。
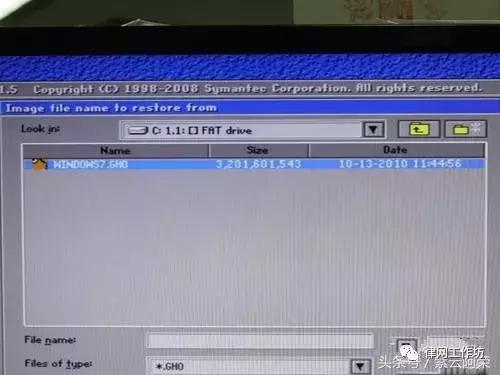
步骤二:选择Win7镜像文件
(2)用户从Look in寻找Win7镜像文件。例如:镜像文件安装在U盘,则将U盘的根目录打开,可以看到“WINDOWS7.GHO”,双击“WINDOWS7.GHO”或者单击“Open”,进入下一电脑安装步骤。
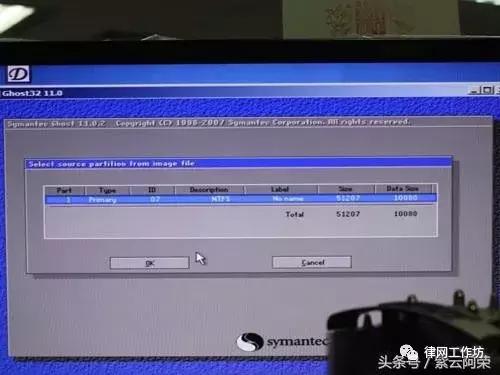
步骤三:Win7镜像文件说明
(3)我们需要选择Win7系统镜像的源数据来源,即安装U盘的GHO文件,Win7系统镜像的数据源封包格式为NTFS,占据约10GB空间,我们需要点击“OK”确认。
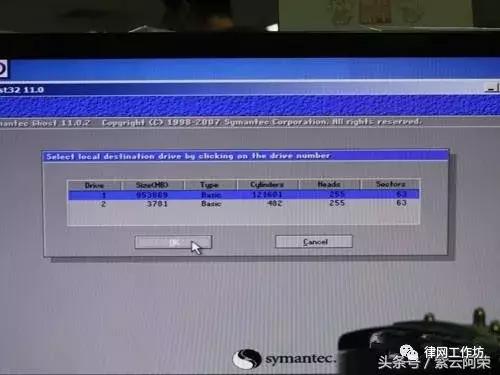
步骤四:选择目标数据硬盘
(4)接着我们需要选择目标数据硬盘,即升级的新硬盘(Drive1,Size容量为953869MB),并点击“OK”确认。

步骤五:选择Win7系统镜像的指定分区
(5)我们需要指定目标数据硬盘的系统安装分区,Primary即主分区(Part1),它是安装操作系统的地方所在。我们选择好Win7系统镜像的指定分区后,点击“OK”。
电脑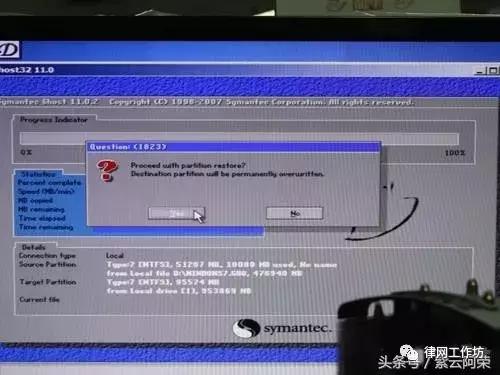
步骤六:还原Win7系统镜像的选择窗口
(6)我们看到Ghost进入还原Win7系统镜像的页面,它会弹出窗口提示将覆盖目标硬盘的指定分区,点击“YES”即可开始还原Win7系统镜像。
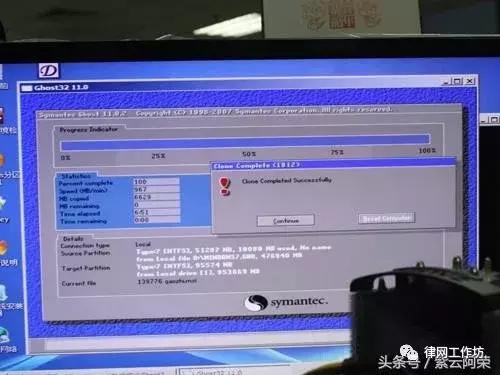
步骤七:Win7系统镜像还原完成
(7)Ghost会有大概6-7分钟的还原数据覆盖过程,当Win7系统镜像全部覆盖指定分区,系统提示“继续操作”或者“重启电脑”。此时已经完成,重启电脑后即可进入大家熟悉的Win7操作系统。
电脑

![RedHat服务器上[Errno 5] OSError: [Errno 2]的解决方法](https://img.pc-daily.com/uploads/allimg/4752/11135115c-0-lp.png)