表格制作一般选用Excel,但是Excel也有难以处理的时候。涉及数据的排版时,还不如使用word进行排版。这里电脑百科知识网小编主要分享一下如何去掉word中已经插入的表格的表框。
操作方法
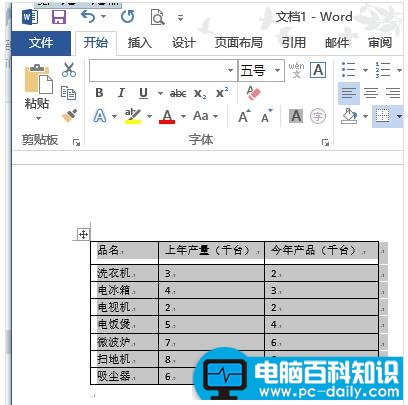
打开Word表格,首先将鼠标移动到表格的上面,这时可以看到在表格的左上角有一个十字形的小标志,左键点击这个标志就能选中表格。表格选中以后呈现灰色底色。
在软件顶端的菜单栏上点击“布局”选项卡,在布局选项中,点击“数据”一项。在展开的下拉菜单中,选择“转换为文本”。
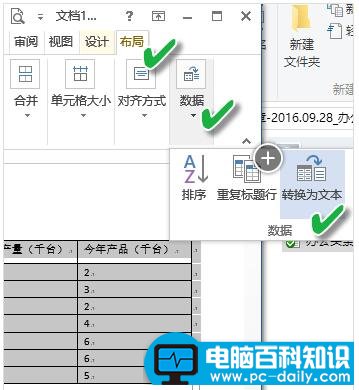
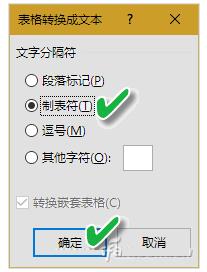
在弹出的“表格转换成文本”对话框中,勾选“制表符”一项,然后点击“确定”完成转换。
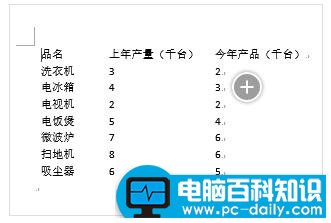
通过以上操作,我们看到的就是去掉表格以后的内容了。
这样就可以发挥Word文字排版的优势,尽情设置你的版面样式了。